> ## Documentation Index
> Fetch the complete documentation index at: https://easymate.ai/docs/llms.txt
> Use this file to discover all available pages before exploring further.
# Google Tag Manager
> Deploy your Sales Assistant chat widget through Google Tag Manager as a Custom HTML tag.
If you manage your website's scripts through Google Tag Manager (GTM), you can deploy your Sales Assistant as a tag instead of editing your site's code directly.
Before you start, [launch your Sales Assistant and copy your install snippet](/docs/solutions/sales-assistant/deploying/overview). Keep it on your clipboard, you'll paste it in below.
## Add the widget as a tag
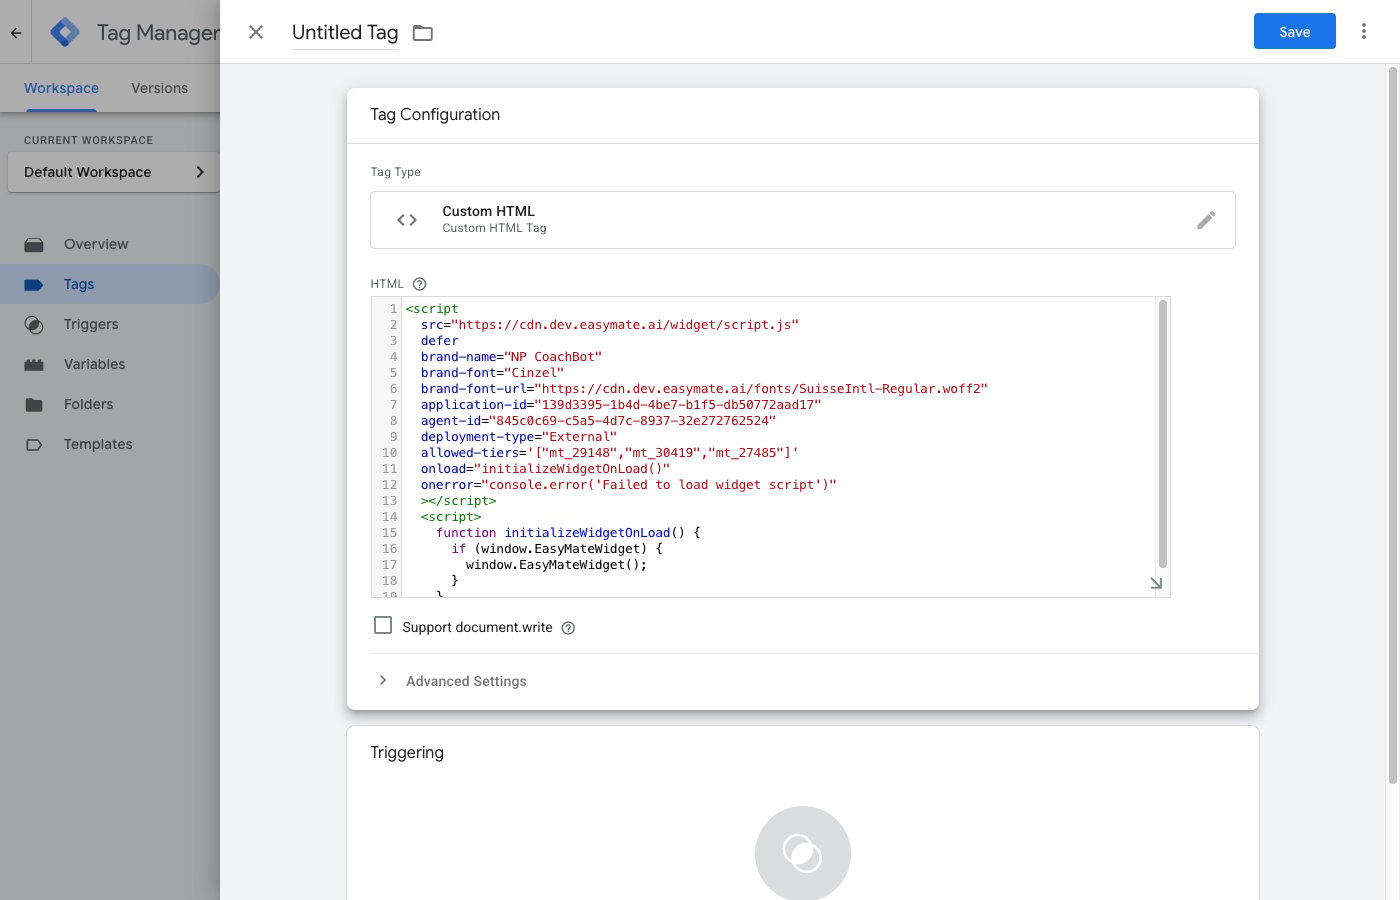
1. In GTM, go to **Tags → New**.
2. For **Tag Configuration**, choose **Custom HTML**.
3. Paste your EasyMate snippet into the HTML box.
4. For **Triggering**, choose **All Pages**.
5. **Save**, then **Submit / Publish** your GTM container.
 GTM tags only go live after you **Submit and Publish** the container. Saving alone won't make the widget appear.
## Verify it's working
1. Open your live site in a new browser tab (or an incognito window).
2. Look for the chat button, usually in a bottom corner, and send a test message.
If it doesn't appear, see [Troubleshooting](/docs/solutions/sales-assistant/deploying/troubleshooting).
GTM tags only go live after you **Submit and Publish** the container. Saving alone won't make the widget appear.
## Verify it's working
1. Open your live site in a new browser tab (or an incognito window).
2. Look for the chat button, usually in a bottom corner, and send a test message.
If it doesn't appear, see [Troubleshooting](/docs/solutions/sales-assistant/deploying/troubleshooting).