Watch a 2-minute overview
Who this is for
Set up a Follow-Up Assistant if:- Your follow-ups are inconsistent and some leads slip away.
- You spend too much time manually sending the same emails.
- You want every lead to get a timely, professional reply without extra effort.
The Follow-Up Assistant uses the pipeline stages from your Leads Portal, so set up your Leads Portal first.
Setting it up, step by step
Setup has two steps.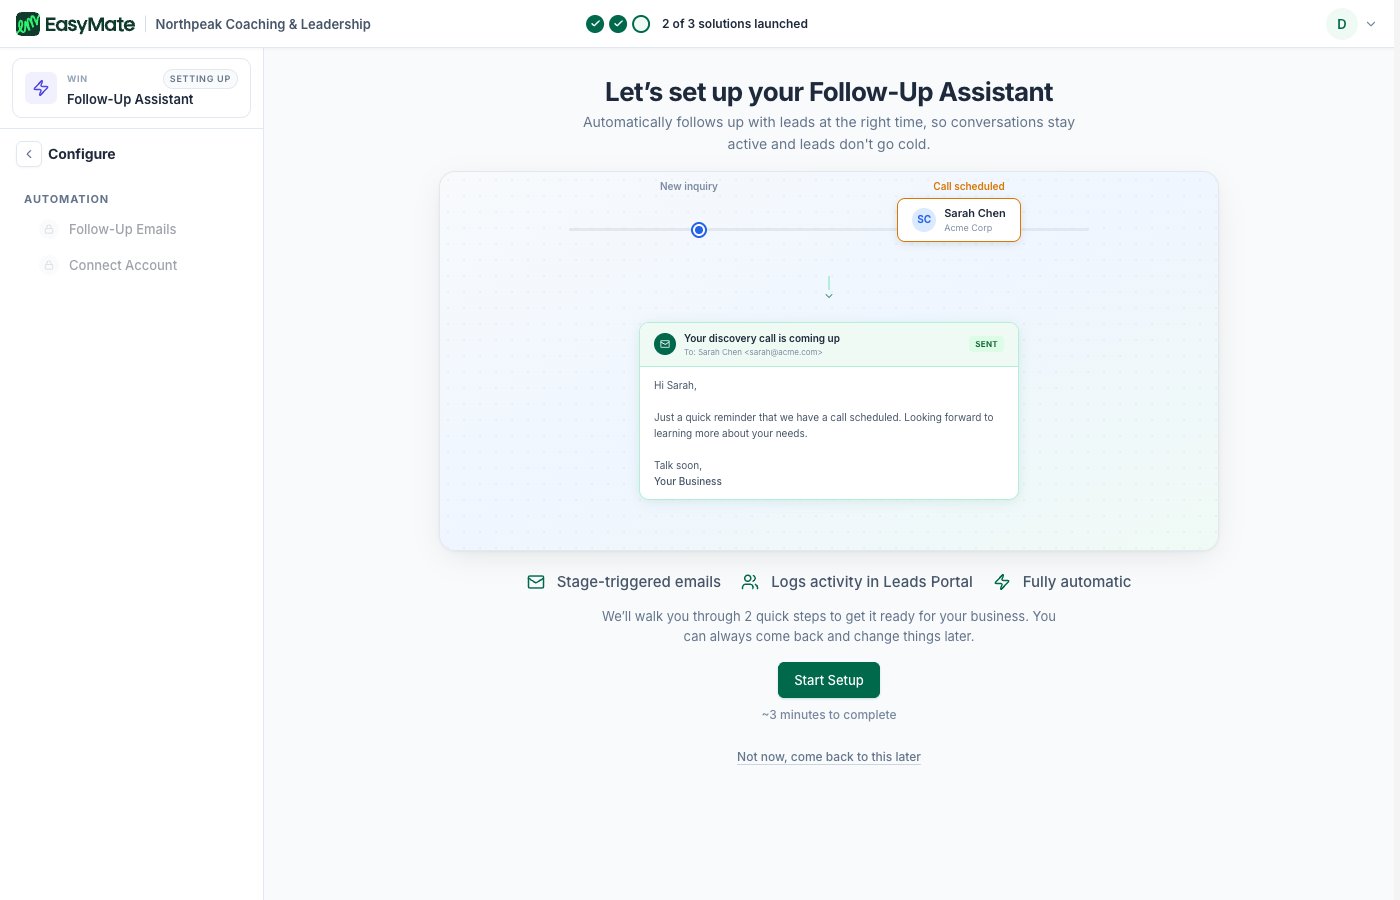
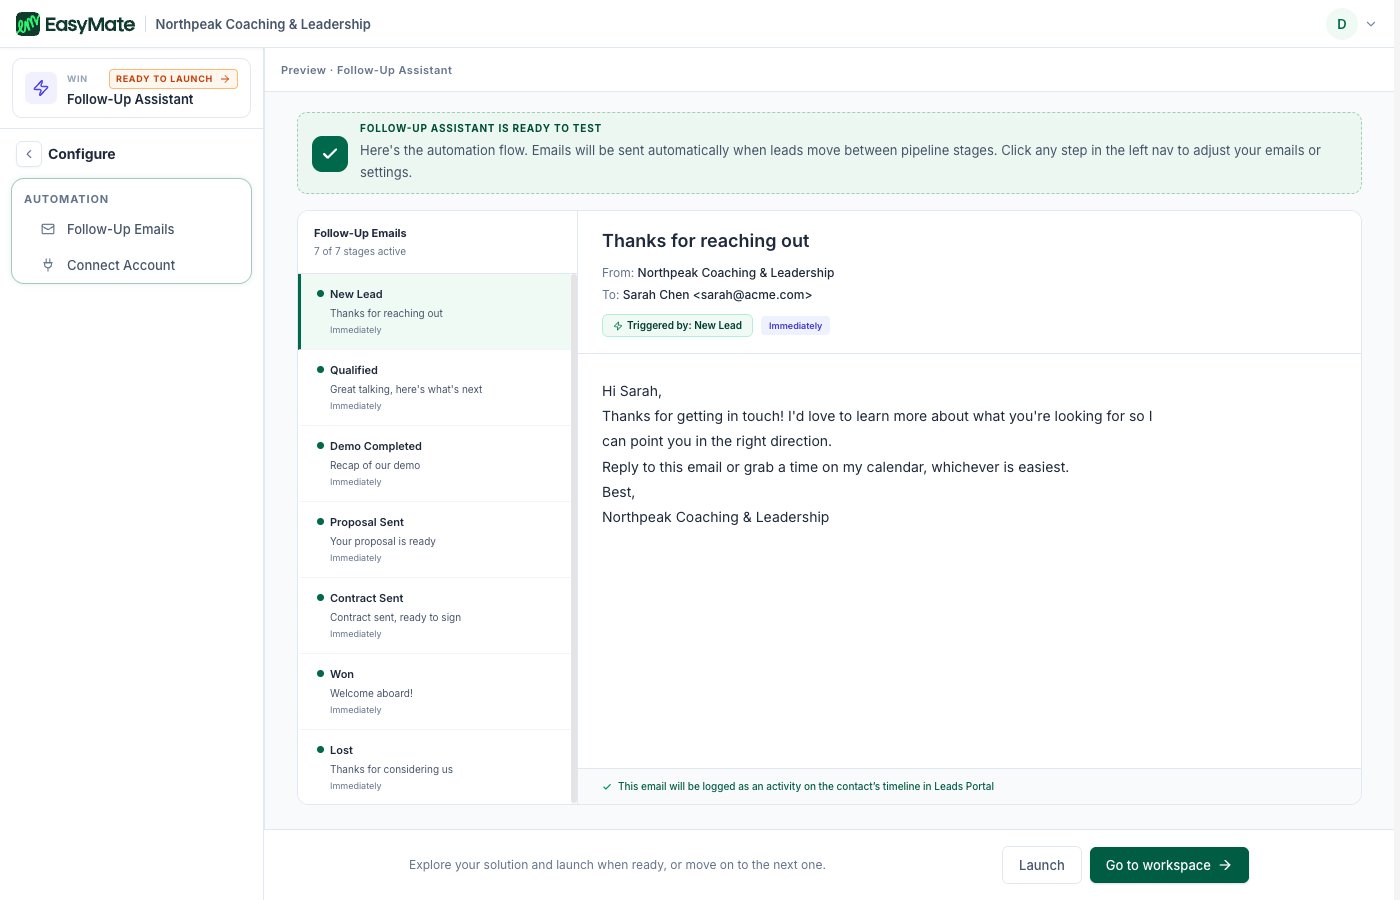
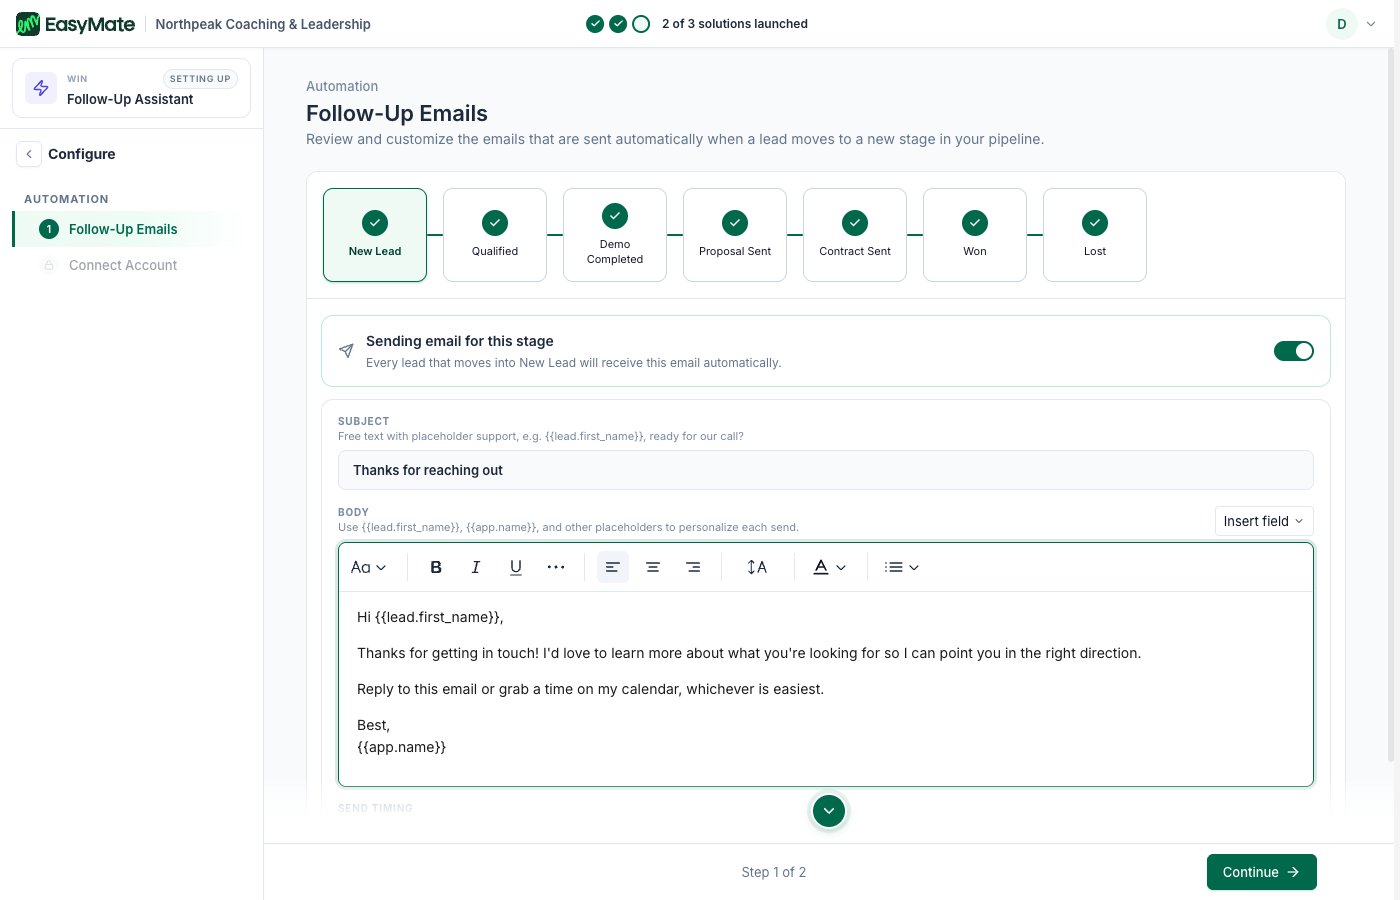
1. Follow-up emails
You’ll see your pipeline stages laid out in a row. For each stage where you want a follow-up, you:- Turn the email on.
- Write the subject and the message. You can drop in details that fill themselves in, like the lead’s name.
- Choose when it sends: straight away, after a set delay like one day, or a custom amount of time.
- Choose a condition, such as always sending it, or skipping it if the lead has already moved further along.
2. Connect your email
Connect your Gmail account so the assistant can send emails from your real address. This is a quick, secure sign-in, and you can disconnect anytime.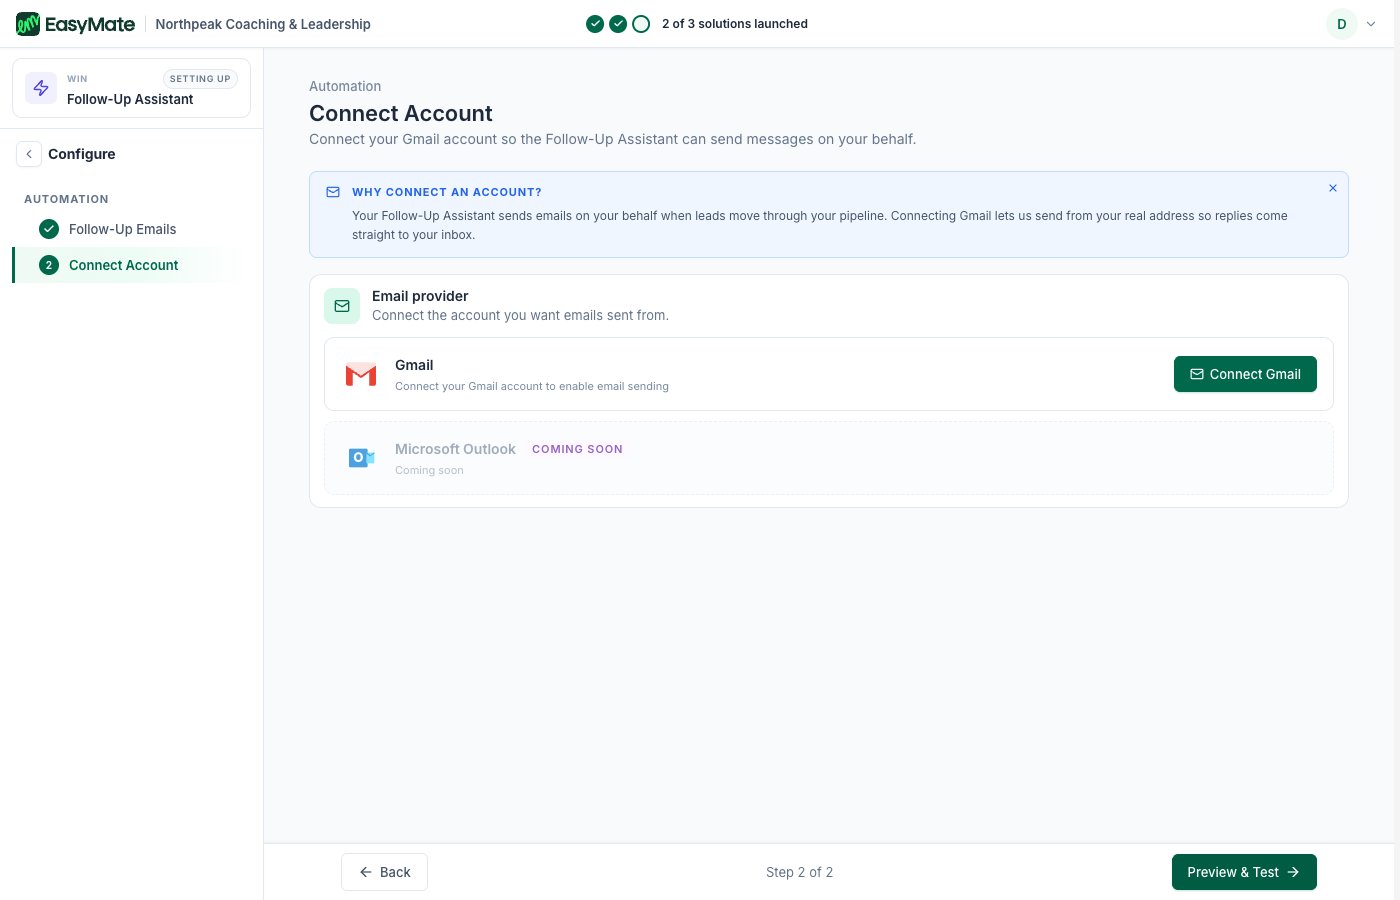
Gmail is supported today. Support for more email providers is coming soon.
Launching your Follow-Up Assistant
Once you’ve turned on at least one stage email and connected your inbox, you take it live from the Launch screen.- Open the Follow-Up Assistant and go to Launch.
- Check the Connected to details: your Leads Portal pipeline (which triggers the emails) and the address you’re sending from.
- Click Launch Follow-Up Assistant, then confirm.
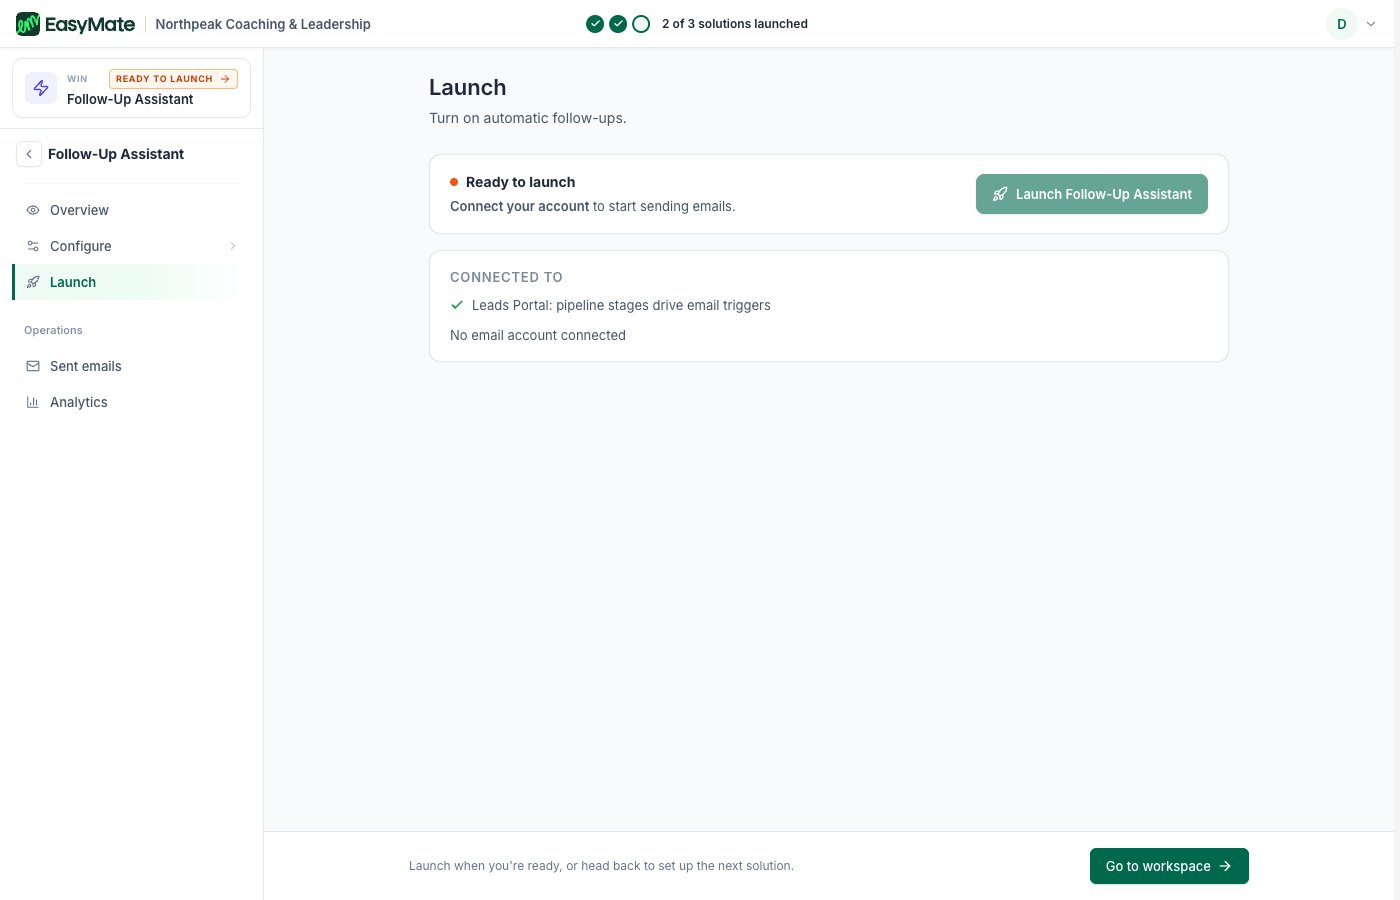
You need your setup finished first: at least one stage email turned on and an email account connected. Until then the Launch button stays disabled and the screen prompts you to finish, for example to connect your email account.
Pausing it
To stop follow-ups, open the Launch screen and click Take offline, then confirm. No emails send until you launch it again, and your emails and settings are kept so you can turn it back on anytime.What you’ll see once it’s live
Once your email is connected and you switch it on, the Follow-Up Assistant runs quietly in the background. There’s no chat bubble and no code to add, it simply watches your pipeline and sends the emails you set up as leads reach each stage. From its page you can see a log of every email it has sent, including who it went to and when, plus simple reports like how many emails went out. Each email it sends is also recorded on that lead’s history in your Leads Portal, so you always have the full picture.