

Before you start, launch your Sales Assistant and copy your install snippet. Keep it on your clipboard, you’ll paste it in below.
Add the snippet with custom code
Webflow has a site-wide custom code area, which is the right place for a chat widget because it loads on every page.- In your Webflow dashboard, open your site’s ⋯ menu and choose Settings (or open the site and go to Site settings).
- In the left menu, open Custom code.
- Paste your EasyMate snippet into the Footer code box (labeled “Add code at the end of the
<body>tag”). - Click Save.
- Publish your site so the change goes live.
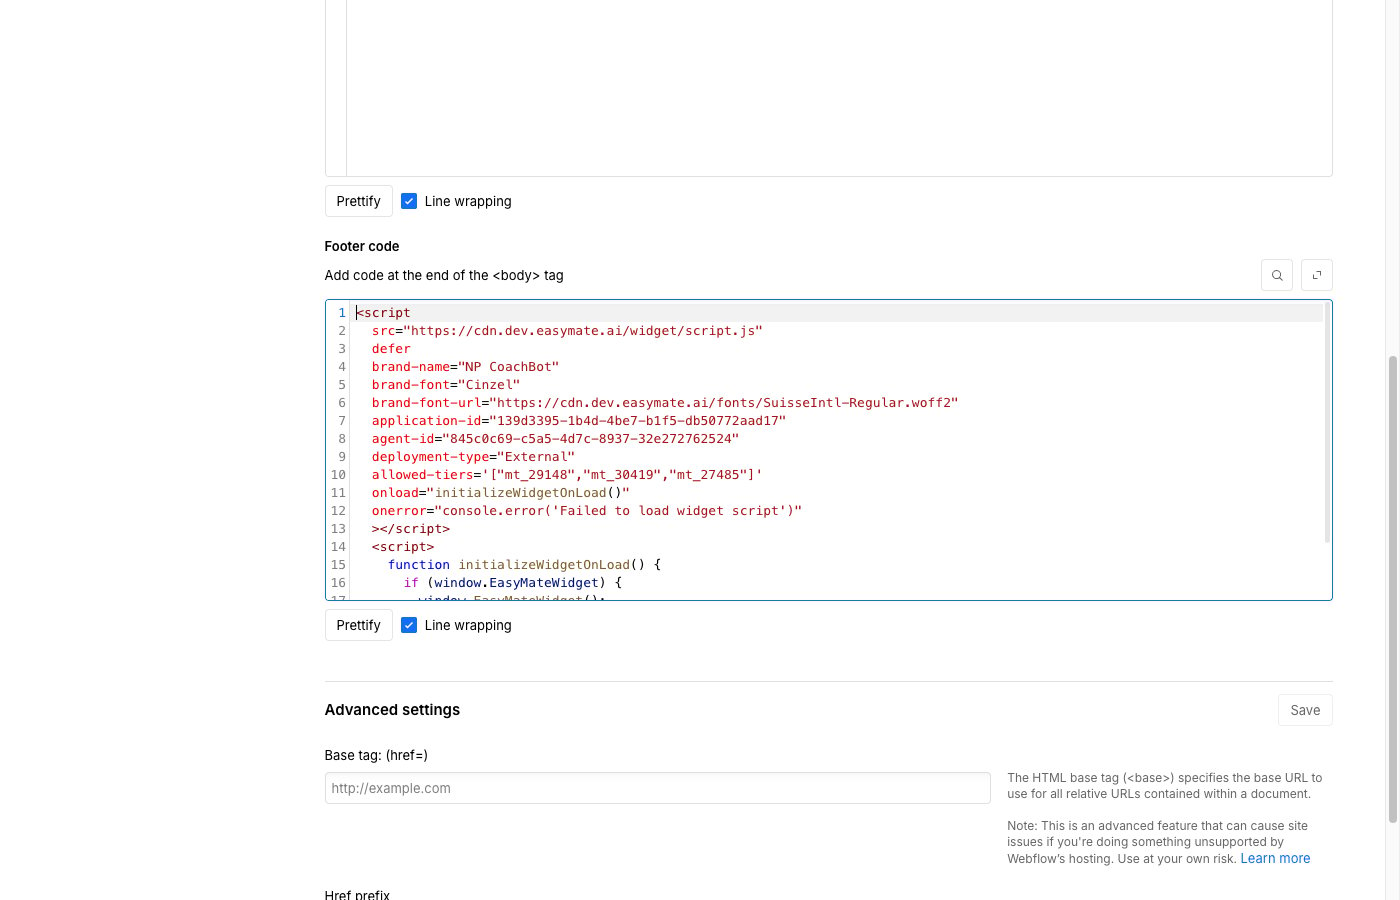
Paste your snippet into the Footer code box, then click Save.
Why the footer box? The widget needs to load after your page content. The footer (before
</body>) is the most reliable spot.Verify it’s working
- Publish your site (custom code only runs on the published site, not the Webflow Designer or preview).
- Open your live site in a new browser tab (or an incognito window).
- Look for the chat button, usually in a bottom corner, and send a test message.